Final Explanation - How was Old Man of the Mountain created and why did he fall?
You are going to create a CER (Claim, Evidence, and Reasoning) how the Old Man was created and how he fell. You are going to have some options as to how you will present your claim, evidence, and reasoning for your sequence. You could do any of the following:
Your CER should be as follows:
Before you can start your project, you must fill in one of the interactive graphic organizers below to create a sequence of events of what happened to the Earth's surface to create/destroy the Old Man. (basically - what had to happen in history to make your landform look the way it does today?)
This project will be due June 8th.
Evidence can come from:
Interactive Graphic Organizer #1
Interactive Graphic Organizer #2
Interactive Graphic Organizer #3
(if you use these, make sure you click the download button before you enter anything. Otherwise it will not be saved.)
- An iMovie
- A Poster (similar to a model)
- A PowerPoint/Google Presentation
- A Weebly
- A paper
Your CER should be as follows:
- Claim - How was your landform created?
- Evidence - How did your labs/readings/activities help you come to this decision?
- Reasoning - How did those processes create and destroy the Old Man?
Before you can start your project, you must fill in one of the interactive graphic organizers below to create a sequence of events of what happened to the Earth's surface to create/destroy the Old Man. (basically - what had to happen in history to make your landform look the way it does today?)
This project will be due June 8th.
Evidence can come from:
- Oreo Tectonic Plate Lab
- Sand Erosion Lab
- Online Erosion Simulation
- Cup and Ice Lab
- Glacier Labs
- Rock and Water Cycle Journeys
- Readings and Maps
Interactive Graphic Organizer #1
Interactive Graphic Organizer #2
Interactive Graphic Organizer #3
(if you use these, make sure you click the download button before you enter anything. Otherwise it will not be saved.)
5/31/18 - Running Record - Glaciers
MAKE SURE YOU CLICK "SEND ME A COPY OF MY RESPONSES" AT THE BOTTOM OF THE FORM.
5/30/18 - Entrance Task - Glaciers vs. Icebergs
Directions:
1. Create a double entry in your journal. Title the left side "My first thoughts" and the right side "My new thoughts." Title the page "Glaciers vs. Icebergs"
2. Based off of our conversation from our scientist meeting yesterday, write (or draw) what you think the difference between an iceberg and a glacier is on the left side.
3. Watch the video below of a glacier "calving." Then click the links below it to learn more about the difference between a glacier and an iceberg.
4. On the right side, write (or draw) your new understanding of a glacier and an iceberg.
5. Also in your "New Thoughts" section, explain how glaciers change the Earth's surface. Think about what they do the landscape as well as what you watched in the video. How could climate change be affecting this?
5/30/18 - More Glacier Pictures
Title your next page "Glacial Landform Practice."
This activity will be similar to what we did with the maps when we looked at plate tectonics. You and your group will get two pictures of glacial landforms. You and your group need to explain in your journals how those glacial landforms got there and how it has changed the Earth's surface. Be sure to include the type of landform it may be. If you cannot decide, you may narrow it down to two or three possible landforms. You may also do a diagram to help show this. You will do this for 6 pictures. Make sure you label each picture! You will only have a few minutes for each picture, so use your time wisely!
This activity will be similar to what we did with the maps when we looked at plate tectonics. You and your group will get two pictures of glacial landforms. You and your group need to explain in your journals how those glacial landforms got there and how it has changed the Earth's surface. Be sure to include the type of landform it may be. If you cannot decide, you may narrow it down to two or three possible landforms. You may also do a diagram to help show this. You will do this for 6 pictures. Make sure you label each picture! You will only have a few minutes for each picture, so use your time wisely!
5/24/18 - Glaciers - Drumlins, Erratics, and Troughs, Oh My!
5/22/18 - Weathering and Erosion Notes and Sketches
Note: This is to be done after you finish and submit the erosion animation assignment from yesterday on Google Classroom.
Directions:
1. Divide your next four pages in your journal into four equal sections. Title it "Weathering and Erosion Notes."
2. Log in to PK Earth and Space Science with the following information:
username: lyndon
password: student
3. Once you are logged in, continue to the following section to read more about Weathering and erosion (note: you will not be able to access the reading in this step if you do not log in from step two first).
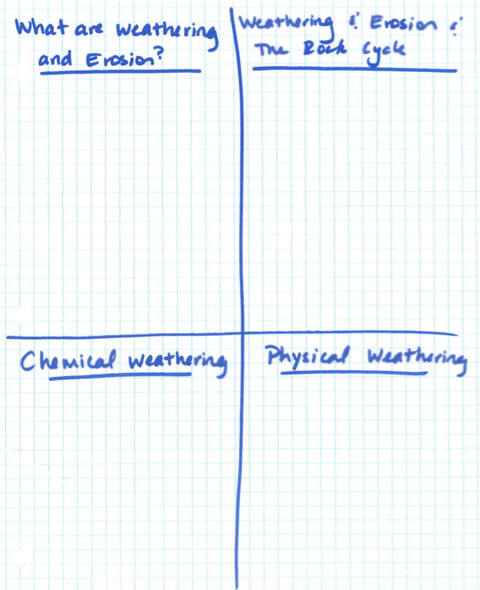
4. You are going to read each section about weathering and erosion and summarize each section with a picture. Each section on the website corresponds to a section you created in your journal. (see my example below) Instead of just taking notes, you are going to summarize the main point about weathering/erosion section with a sketch and one or two sentences. Make sure you include any key vocab from the reading into your sketch. Key vocab words are bolded and give you the definition when you put your cursor over them. The sections are short and your picture just needs to depict what they are teaching you about weathering erosion. Do not just copy the picture from the reading - it may not be helpful!
Directions:
1. Divide your next four pages in your journal into four equal sections. Title it "Weathering and Erosion Notes."
2. Log in to PK Earth and Space Science with the following information:
username: lyndon
password: student
3. Once you are logged in, continue to the following section to read more about Weathering and erosion (note: you will not be able to access the reading in this step if you do not log in from step two first).
4. You are going to read each section about weathering and erosion and summarize each section with a picture. Each section on the website corresponds to a section you created in your journal. (see my example below) Instead of just taking notes, you are going to summarize the main point about weathering/erosion section with a sketch and one or two sentences. Make sure you include any key vocab from the reading into your sketch. Key vocab words are bolded and give you the definition when you put your cursor over them. The sections are short and your picture just needs to depict what they are teaching you about weathering erosion. Do not just copy the picture from the reading - it may not be helpful!
5/21/18 - Continuing with Erosion
1. In your journal, title your next page, "How Wolves Changed the RIvers." Then, watch the video below about the wolves in Yellowstone. In your journal, write a 1-page summary of the video. Be sure to include what you learned how erosion connects to this phenomenon as part of your summary.
2. Go to Google Classroom and open the assignment, "Water Erosion Animation."
Click on the link below to open the animation. Follow the directions on the assignment to work your way through the animation.
EROSION ANIMATION
3. Go back to the running record and finish your reflection on erosion. Include anything new you learned!
Click on the link below to open the animation. Follow the directions on the assignment to work your way through the animation.
EROSION ANIMATION
3. Go back to the running record and finish your reflection on erosion. Include anything new you learned!
5/15/18 - Erosion
5/14/18 - Earth's Changing History Flipboard
Earth's History Running Record
5/10/18 - Tectonic Plate Practice
Here is how today will go!
Interactive Maps
Earthquakes (Cracked Plates)
Mountains (Mountain Building)
New! Volcanoes (Global Volcanoes)
- Finish taking notes from "Mountain Maker Earth Shaker."
- Journal work - We will do 10 minute rotations with three different pictures about plate tectonics.
- Title your journal page: Tectonic Plates and Landforms
- For 10 minutes, your table work with one picture and answer the question(s) with that picture. Make sure you label each question with the correct picture number. Please make sure you answer your questions in complete sentences. You may also use diagrams to help explain your answers, as well as the interactive maps we have used previously.
- Seesaw Post with Oreo Tectonics - create a post in Seesaw to add your photos/videos of your Oreo tectonic plate boundaries. Please make sure you include the following in your photos as labels. You can include other pictures to support your post as you see fit.
- A label of what each boundary is.
- A description of the tectonic plates are doing
- What each boundary can result in (mountains, earthquakes, etc.)
- Slip, Slide, Collide - When you finish your Seesaw post, click on the link and work your way through the activity! Please make sure you read through each section as you work your way through the activity. You will do a reflection on Seesaw on something new you learned from each "level." :)
Interactive Maps
Earthquakes (Cracked Plates)
Mountains (Mountain Building)
New! Volcanoes (Global Volcanoes)
5/9/18 - Tectonic Plates Notes
Mountain Maker, Earth Shaker
Directions: In each box in your journal, draw a sketch of what happens at each tectonic plate boundary. Also include a brief description of what is happening with the tectonic plates and the results on top of the crust (what we see up here!)
Directions: In each box in your journal, draw a sketch of what happens at each tectonic plate boundary. Also include a brief description of what is happening with the tectonic plates and the results on top of the crust (what we see up here!)
5/8/18 - Earthquake, Mountain, and Volcano Maps
5/7/18 - Layers of the Earth
Directions: On your Earth's Layers handout, label the layers of the Earth. Make sure you include:
This is to be done INDEPENDENTLY.
- Crust
- Mantle
- Outer Core
- Inner Core
- Lithosphere
- Asthenosphere
- The elements that make up each layer (crust, mantle, core)
- A brief description of each layer
- How big each layer is
- The temperature in each layer
This is to be done INDEPENDENTLY.
